|
Where: Mexico
|
Alternate Name(s): Encantada
|
|
Latitude/Longitude: 31°
3' N; 115° 26' W
|
State/Province: Baja California
(Highest Point)
|
Following is a piece written by Richard
Carey. His informative site, dedicated to 25 years of
his mountain climbing experiences, can be found at: http://www.peakbagging.com.
Picacho del Diablo
Notes
This is not a trip report, but a compilation
of my thoughts and notes on climbing Picacho del Diablo
derived from three successful ascents and several not
so successful forays to the mountain. This mountain at
10,154 feet (3095 meters) is the highest peak in Mexico's
Baja peninsula and is a popular climb. It has been done
in a grueling 18 hour day hike, but most elect to do the
peak in a three or four day backpack starting from the
National Park to the west. The eastern route from the
desert floor up Canon del Diablo is not tried as much
as in the past because of reports of vandalism of vehicles
at the remote canyon mouth. It is also a longer trip and
hotter due to the low elevation at the start. Here then
are my notes that will help you prepare for the trip to
Picacho del Diablo. All of this pertains to a west side
approach which is the most commonly used route at this
time.
|
|
|
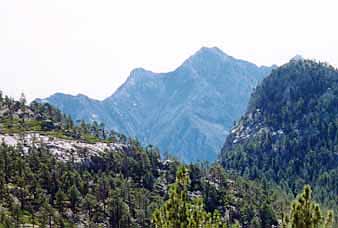
View of Diablo from Observatory
Road.
Photo by Chistopher E. Brennen
|
Location: Most U.S. citizens
will be starting from San Diego, California and crossing
the border to Tijuana, Mexico. From central San Diego
it is about 240 miles driving distance to the trailhead.
This drive takes nearly all day; about an hour and a half
to Ensenada, two more hours to the turnoff onto the dirt
road, and another three hours to the National Park. The
last 60 miles is well-graded dirt up to the observatory
that most cars can negotiate with careful driving. Make
sure you have good tires and a functional spare since
help is a long way off. When in Tijuana look for signs
leading to the "Scenic Route" to Ensenada. This will direct
you after a loop to the road going west along the border
then to the toll road that starts in the La Playa area.
In May 2001 the cost was 21 pesos at each of the three
toll stations or 63 pesos total one-way to Ensenada which
is about US $7.00. You may pay in either dollars or pesos.
You get a little better deal if you pay in pesos. From
Ensenada it is another two hours on the sometimes winding
route 1 to the town of Colonet. Eight miles south of this
town there is a well-marked sign to the Parque Nacional
and Observatorio. At a point 1.1 miles before this turn
there is a new Pemex station on the east side and I suggest
you fill your gas tank here.
Best Time to Go: I like the
months of May or September, but the trip can be done in
the summer months since most of the route is well above
6,000 feet. There is a chance of afternoon thunderstorms
in July and August. In May or September the chances of
rain are slim. It is risky going in the winter from November
to April since there can be snow on the steep slopes on
the north side of Blue Bottle making the traverse there
treacherous.
Mexican Auto Insurance: You
definitely should purchase Mexican Auto Insurance before
crossing the border. At the last exit on Interstate 5,
Via de San Ysidro, there are several insurance agencies.
If you get into an accident without insurance you could
be thrown in jail, not a pleasant thing in Mexico.
Tourist Card: If one is traveling
south of Ensenada or staying in Mexico more than 72 hours
then a tourist card is required. These used to be a form
you picked up for free, but now they are US$20.00 per
person. On a recent trip we did not get the card and found
that we were never asked to show it as others had reported.
However, in case of problems with officials, be sure to
have proof of citizenship with you such as a birth certificate,
green card, or valid passport. A driver's license is NOT
sufficient.
Don't use an ATM card in Mexico:
An article in the local Marine Corps newsletter, the Chevron,
tells of a fellow who used an ATM in Tijuana and got back
a different card than he had inserted! Not only that but
he later found he had been billed for an extra $310. His
local bank in San Diego couldn't help him recover the
money either. So take enough money with you and don't
use an ATM card. Better yet don't even take the card down
there.
Dirt road to the Parque Nacional:
This is a 60 mile route through farming communities and
then over a mountain on a steep, rocky section after which
the road descends to a final valley with the famous Meling
Ranch before climbing up to the forested plateau. At about
29 miles from route 1 you will see the first Meling Ranch
sign. Go right here toward the Ranch. Then in 0.3 miles
there is a second Meling Ranch sign where you want to
go left toward the Observatorio. At about 47 miles you
will reach some cabins and a gate at the Parque Nacional
entrance. Generally the gate will be open. The park fee
is paid some miles ahead where you may find a Ranger by
the road. The fee is 70 pesos per person or US$7.00. There
is a new headquarters building under construction where
the fee will be collected in the future. This may be done
by the fall of 2001.
|
|
|
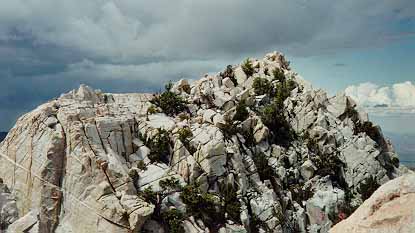
Summit of Picacho del Diablo
Photo by Chistopher E. Brennen
|
Trailhead: At about 57 miles
from route 1 or 10 miles from the park entrance there
is a junction with a sharp turn on the right. Take this
turn which leads south past a building with a well to
the trailhead. After 2.5 miles on this road you will each
the trailhead area with a wooden pyramid by a campfire
ring. Park and camp here. The road continuing south to
the Los Llanitos shack trailhead is now chained off in
about a quarter mile so this shorter route cannot be used.
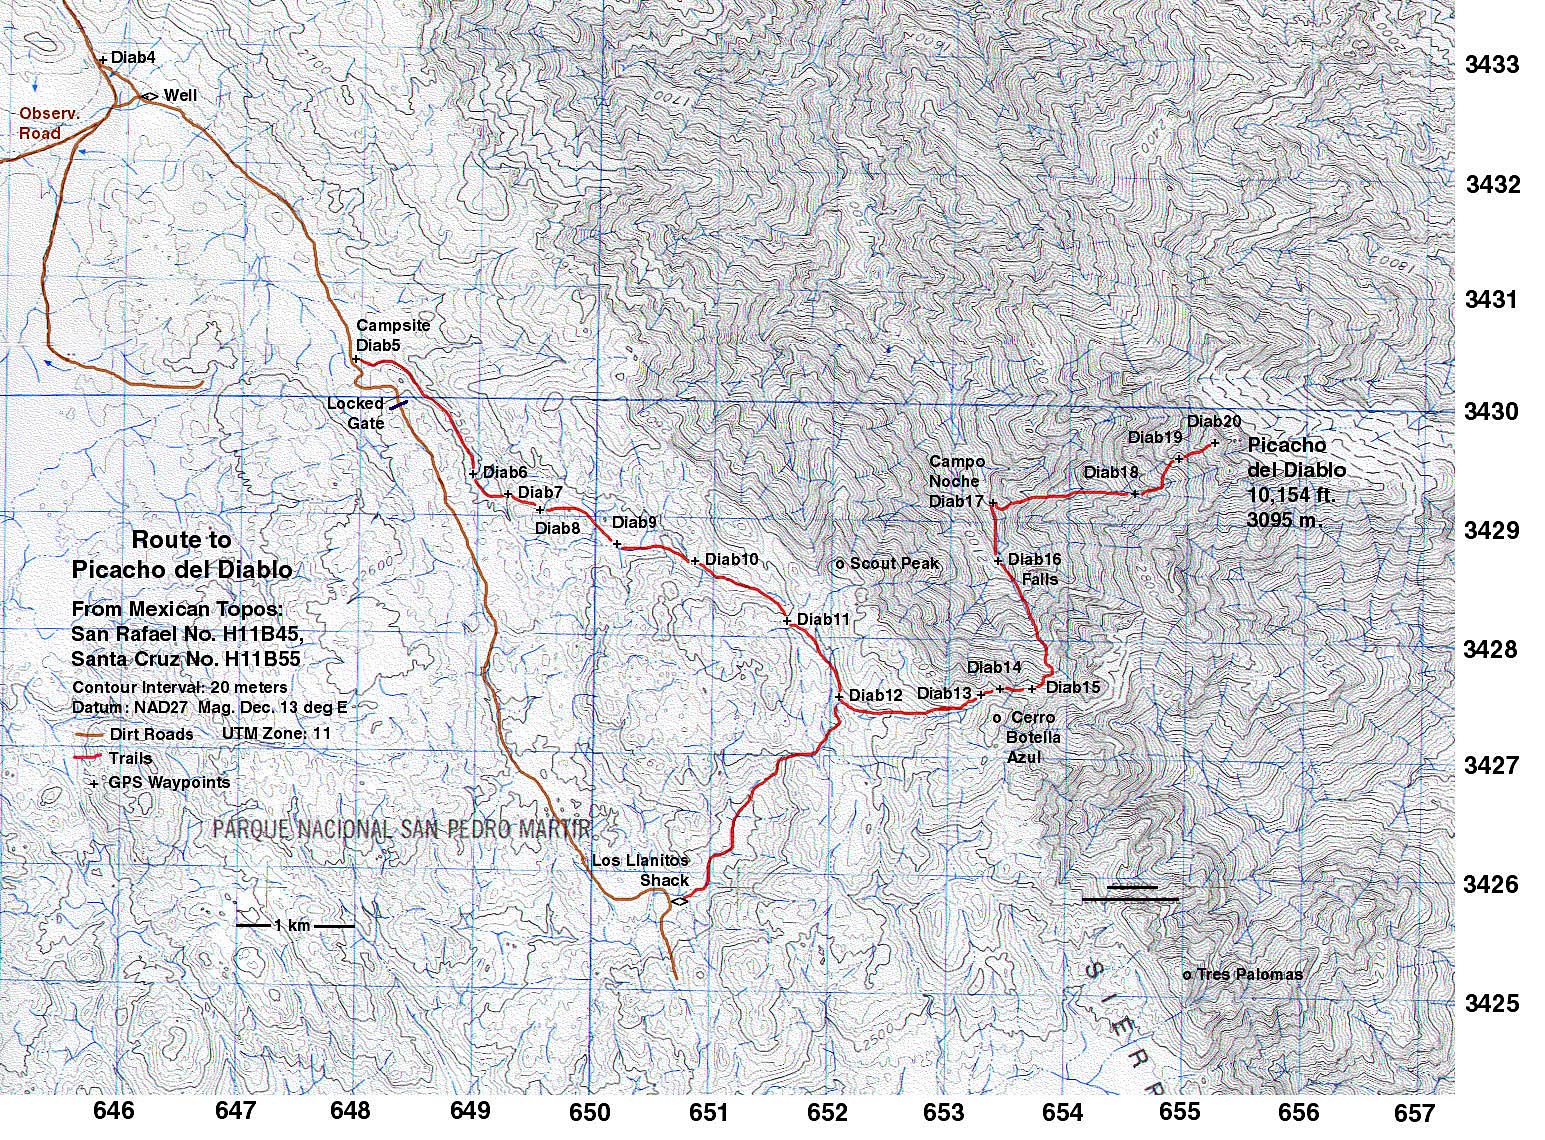
Hiking Route: See the map
listed on this page that shows the hiking route in detail.
Waypoints are marked on the map that correspond to points
in the file you may load into your Garmin GPS receiver.
Typically the plan is to backpack to Campo Noche in the
canyon west of the peak on the first day then do the peak
the next day and hike out the third day. Here are statistics
for these three days:
Day 1 - Trailhead to Blue
Bottle Saddle: 4.5 miles, 1300 feet gain Blue Bottle Saddle
to Campo Noche: 1.75 miles, 3080 feet loss
Day 2 - Campo Noche to Summit:
3.0 miles, 3850 feet gain, 3850 feet loss
Day 3 - Campo Noche to Blue
Bottle Saddle and back to trailhead: 6.25 miles, 3080
feet gain, 1300 feet loss
Total gain and loss both ways:
16,460 feet
Total distance: 15.5 miles.
Note: If you are not using
a GPS unit then you definitely should have a compass for
navigation. The drainages and ridges in the forest go
in various directions and there are no visual landmarks
since neither the observatory or Picacho del Diablo are
visible until you reach Blue Bottle Saddle. After this
saddle be sure to proceed east as far as possible on the
use trail before descending into the canyon. If you go
down too soon the terrain gets very steep and difficult.
About half way down to Campo Noche there is a tough spot
where you may have to hand down packs over a ledge. On
the way out a short rope or sling is handy to lift packs
up for those who can't negotiate this spot.
Hiking Times: This can vary
a lot as I found out recently. Here are some times based
on my experience:
Trailhead to Blue Bottle Saddle: fast group
- 3 ½ hours, slow group - 5 hours
Blue Bottle Saddle to Campo Noche: fast
group - 4 hours, slow group - 6 hours
Campo Noche to summit and back: fast group
- 8 ½ hours, slow group -12 hours
Campo Noche to trailhead: fast group - 7
hours, slow group - 11 hours
Equipment: It is very important
to GO LIGHT on the backpack! The terrain is rough, off-trail
and anything you haul down to Campo Noche has to hauled
back up the steep slope to Blue Bottle. So don't take
anything unnecessary! I have never taken a tent since
the chances for rain in May and September are remote.
This saves a lot of weight. Take a light ground cloth,
Thermorest or equivalent, light down bag, and an extra
ground cloth or plastic sheet as a cover just in case
there is rain. Nighttime temperatures are 45 to 50 degrees
F so a light sleeping bag is fine. Mosquitoes have never
been a problem. There has been a small ring-tailed cat
at Campo Noche so hanging food is a good idea.
Water: There is water half
way to Blue Bottle Saddle just past the aspen grove and
part way down the canyon at the waterfalls. I generally
don't rely on these sources and prefer to start the backpack
with 3 quarts and leave a quart at Blue Bottle Saddle
for the hike out. Water is safe and reliable at Campo
Noche. I have never used a filter and have not heard of
anyone getting sick drinking it untreated. I have found
2 quarts adequate on summit day, however in case it is
hotter than normal I suggest bringing an extra bottle
unfilled which can be filled up at the camp. Bring extra
water in the vehicle for car camping since none is available
at the trailhead or in the Parque Nacional.
Pack: Try to keep your overall
weight with water under 35 pounds. A light-weight day
pack is needed for summit day. An internal frame pack
is best since it is more compact, but an external frame
is OK. Try to keep the load low, not above your head,
so it won't catch on low branches.
Clothes: I recommend long
pants since there are stinging nettles in the canyon.
I like light-weight nylon pants. Wear a good sun hat and
sun screen lotion. I often wear gloves. A hiking staff
is OK for the backpack, but I don't suggest it for summit
day. A bandana is useful.
Maps: For help on the driving
route the American Automobile Club map of Baja California
is about the best. The hiking route is on two of the Mexican
1:50,000 scale topographic maps. The Santa Cruz map, number
H11B55, has the summit and the next map north, San Rafael
number H11B45, has the trailhead. Note that some named
features including Picacho del Diablo and Cerro Botella
de Azul (Blue Bottle Peak) are not located correctly on
these maps. The map file listed here is a composite scan
of both maps and has the peaks and trails correctly shown.
Set your printer to landscape mode to print this map.
View the map. (1.2Meg jpg file)
A good map worth getting for your trip is
"Parque Nacional San Pedro Martir" by Jerry Schad, published
by Centra Publications in 1988. This map has accurate
route and place names, but does not have a Lat/Long or
UTM grid for GPS navigation which the Mexican topo shows.
The Centra Publication map and the Mexican
topos are available in San Diego at The Map Centre, 3191
Sports Arena Blvd., San Diego, CA 92110. Telephone: (619)
291-3830. Toll free in the US at: (888) 849-6277. They
have a web page at: www.mapcentre.com
Mexican topos can be purchased in Tijuana
at the Instituto Nacional de Estadistica Geografia e Informatica
(INEGI) office at 1046 Ave. Revolution. This is on the
west side of the street across from the Jai Lai Palace.
Phone number there is 685-0467 or 685-1570. The staff
only speaks Spanish. The topos are US$6.75 each which
is considerably less than at the Map Centre.
References: The following
books are helpful for background information on the mountain
and surrounding area:
1. "Camping and Climbing in Baja" by John
W. Robinson. La Siesta Press, 1967. Early history of climbing
Picacho del Diablo.
2. "Coming Home from Devil Mountain" by
Eleanor Dart O'Bryan. Harbinger House, Tucson, Arizona,
1989. A disasterous trip where the author and her boyfriend
had to be rescued from Picacho del Diablo.
3. "Where the Old West Never Died" by Paul
Sanford. The Naylor Co., San Antonio, Texas, 1968. History
of the Meling Ranch.
Thanks to Erika Sohn for pointing out that
the UTM zone on the map was wrong.
It is now corrected to zone 11. The waypoint file has
the zone correct. (Revisions May, 2003)
Richard L. Carey June, 2001
|
~Other
Links~
|
~Maps~
|
|
|
 West
Approach Topo with Waypoints (735k) West
Approach Topo with Waypoints (735k) |
| |
|
|